
How it works
Instructions are the same for adding a Pickdown regardless of whether it is onto an electric, acoustic or bass guitar.Summary
1. Remove Pickdown and Mounts from the packaging.
2. Ensure the Mounts are located in position on the base of the Pickdown.
3. Put guitar on a flat surface.
4. Turn Pickdown upside down so that you can see the interior of the Pickdown.
5. Remove the thin plastic film covering the sticky nanotape on the base of the Mounts.
6. Lift the Pickdown up and carefully turn it over so that the sticky nanotape is facing down.
7. Hold base of Pickdown and Mount pushing inwards towards the centre of the Pickdown.
8. Make sure that the audio jack is in your left hand.
9. Position the Pickdown and Mounts across the strings where the neck of the guitar meets the body just above the sound hole.
10. Ensure that the Pickdown is parallel to the frets and the audio jack aperture is pointing in the same direction as the neck
11. Press the Pickdown and Mounts onto the body of the guitar.
12. Connect one end of your guitar lead to the Pickdown’s audio jack and the other to your amplifier.
Detailed Instructions
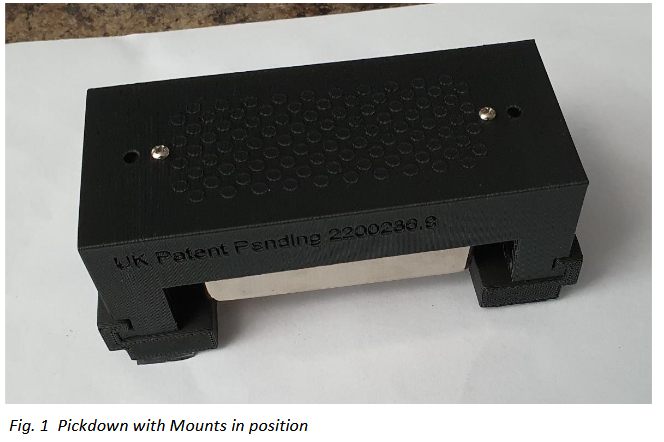
Remove the Pickdown from its packaging. The Mounts should already be in position on the base of the Pickdown as shown in Figure 1 below.
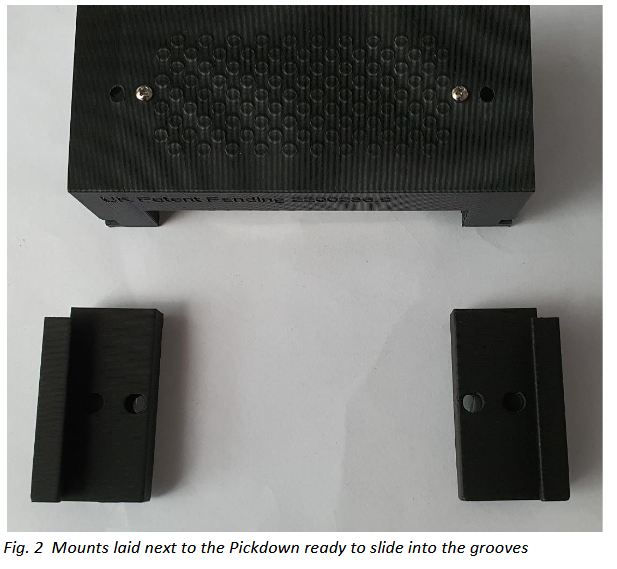
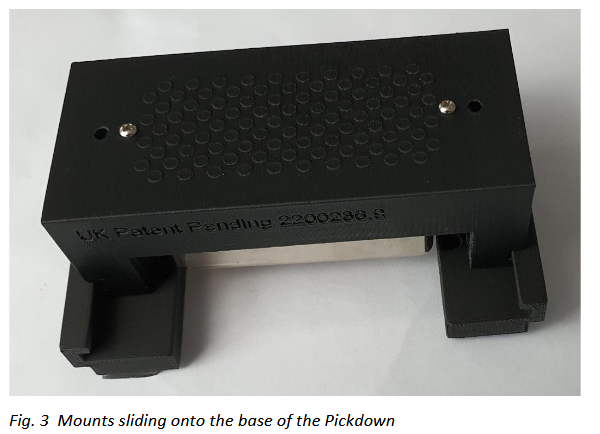
If the Mounts are not in position, lay them out as shown in Figure 2 and slide them onto the base of the Pickdown as shown in Figure 3 until they are flush with the Pickdown as shown in Figure 1. Note that the Patent Pending writing is facing towards you and the short end of the Mount groove is closest to the Pickdown.
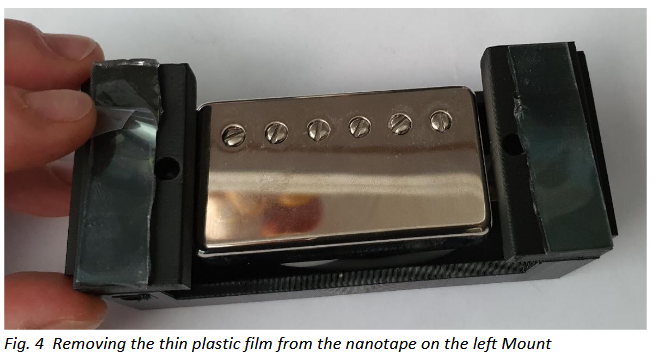
Carefully turn the Pickdown and Mounts upside down and remove the thin plastic film covering the sticky nanotape on the base of each Mount as shown in Figure 4.
Once you have removed the thin plastic film from the nanotape on the two mounts, carefully turn the Pickdown and Mounts over so that the audio jack is in your left hand.
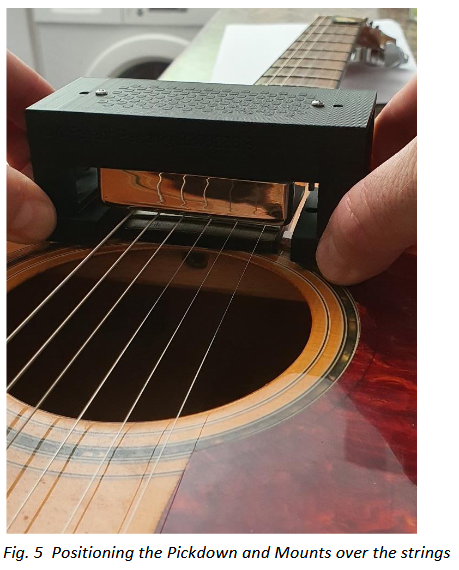
Lift the Pickdown and Mounts and position them over the strings where the neck meets the body of the guitar as shown in Figure 5. The audio jack should be on the left.
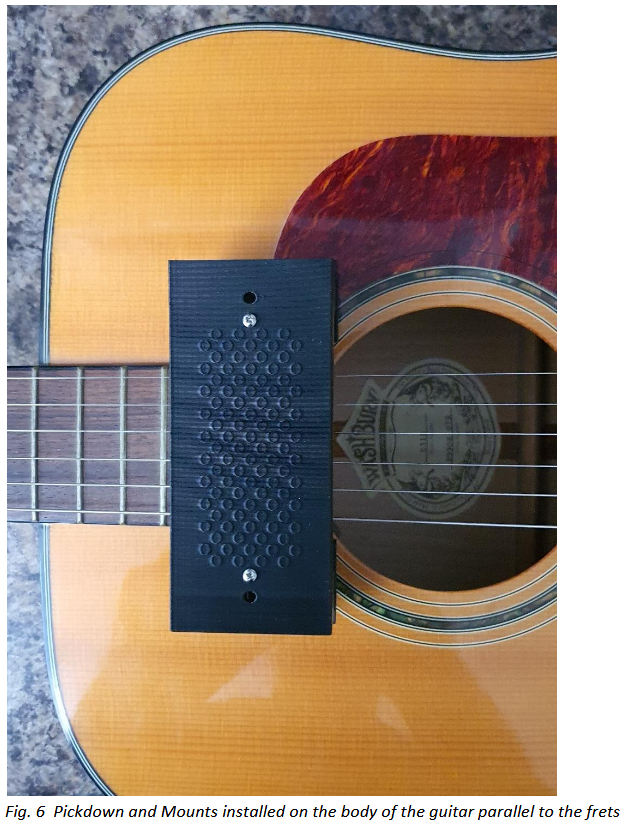
Make sure that the Pickdown is parallel to the frets then push the Mounts towards each other as you press the Pickdown and Mounts downwards onto the body of the guitar as shown in Figure 6.
Pushing the Mounts towards each other ensures that the Pickdown fits snugly into the Mounts when installed on the guitar.
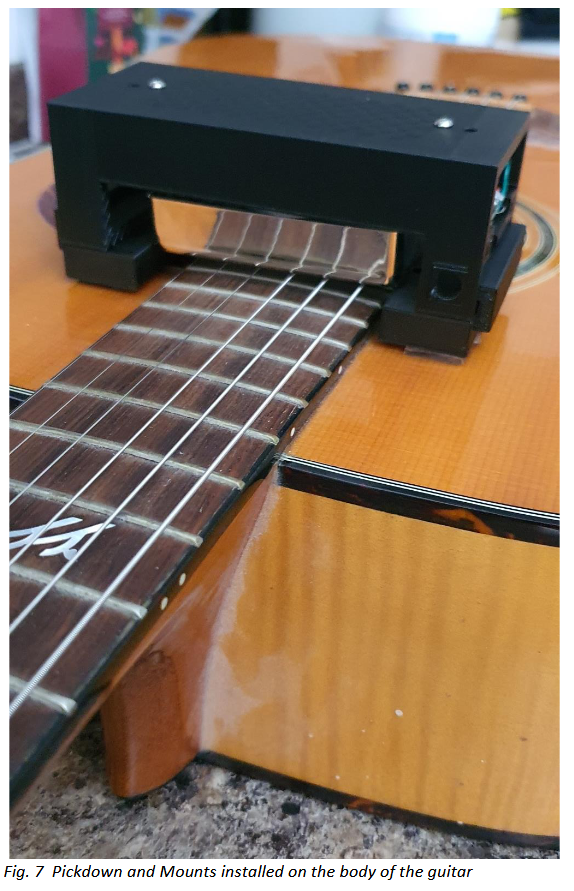
The installed Pickdown and Mounts should look as shown in Figure 7 below. The picture in Figure 7 is taken from the opposite direction to the picture in Figure 5. Note that the audio jack aperture is facing in the same direction as the neck of the guitar.
You can now connect one end of your guitar lead to the Pickdown’s audio jack and the other end to your amplifier. Have fun!!
Adding Different Pickdowns
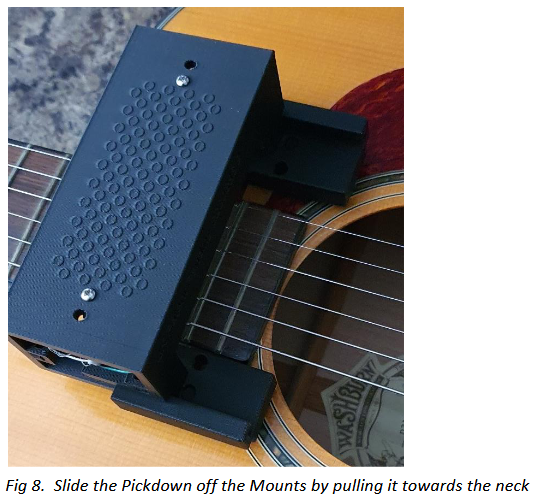
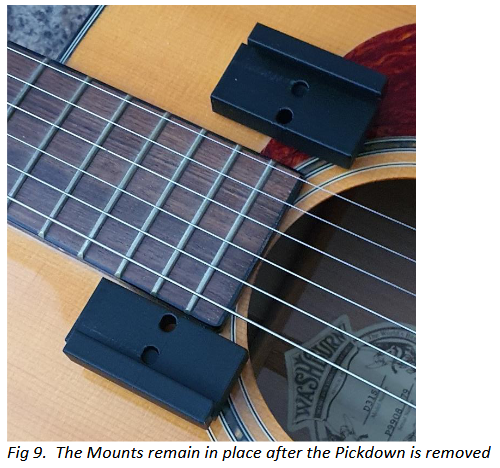
Once you have installed the Pickdown and Mounts, you will be able to remove the Pickdown from the Mounts simply by sliding it towards the neck of the guitar as shown in Figure 8. The Mounts will remain in place ready to receive the next Pickdown as shown in Figure 9.
Removing the Mounts
If you wish to remove the Mounts, pull the end with the short groove upwards while pressing down on the opposite end as shown in Figure 10.

Once you have removed both Mounts, you can peel off the nanotape by rubbing your finger firmly on the nanotope from the neck end to the body end. The nanotape should peel off the body of the guitar. The warmer the tape is, the easier it is to rub off.